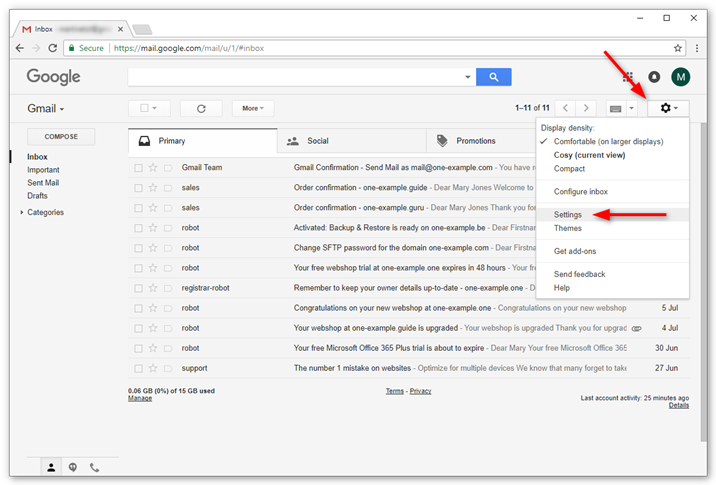
One of the most popular email services available is Gmail. Many people use to manage their business and personal emails. However, if you are using POP3 to send and receive emails, it can be time-consuming to set up an account.
Here you will find step-by-step instructions on how to set up a POP3 email account in Gmail that will allow you to send and receive all your emails without any problems.
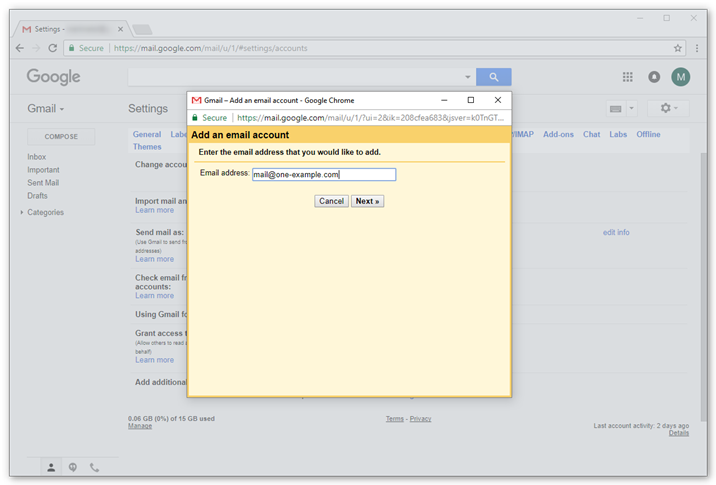
Type in the email address you want to set up in Gmail.
Click Next.
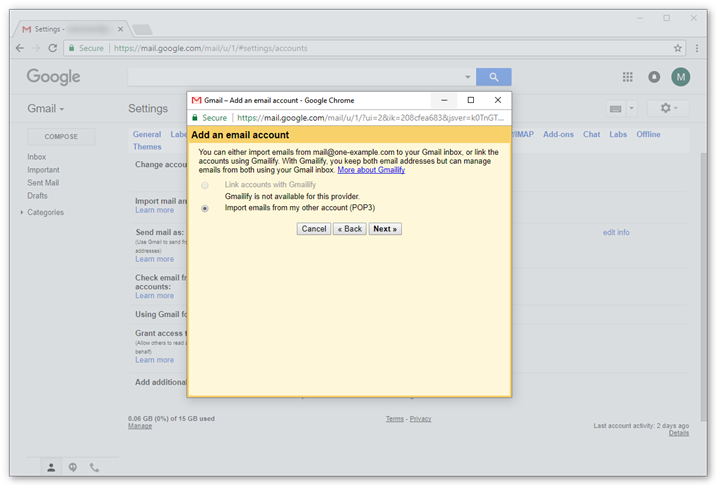
Step 4 – Confirm You Want to Import With POP
For some accounts it’s possible to link an account to a service called Gmailify. This is not possible for your email account hosted with Blaser Hosting.
Select “Import emails from my other…“.
Click Next.
Step 5 – Enter the POP Server Settings
Please use the following settings for the incoming email:
Username: your email address
Password: the password you use to log in to Webmail
POP Server: mail.yourdomainname.com
Port: 110
Uncheck the option to leave a copy on the server (Recommended).
Check the option the use SSL.
Click Add account to continue.
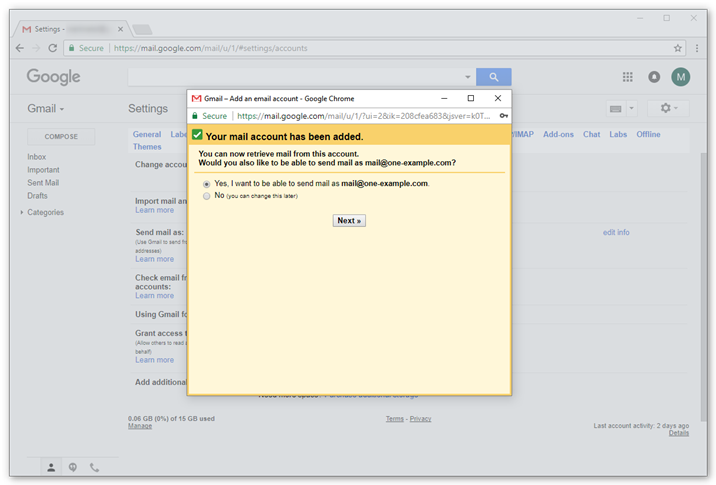
Step 6 – Confirm You Want to Send From Gmail
You can now receive emails from your email account in Gmail. The next step is to set up the outgoing settings, so that you can also send emails from your account.
Select “Yes, I want to be able to send…“
Click Next.
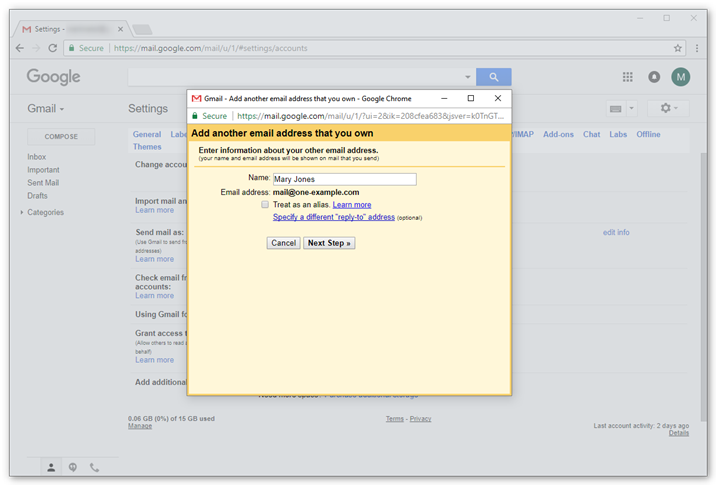
Step 7 – Enter the Sender Name
Enter the sender name you want to be visible to your recipients.
Click Next step.
Tip: If your Gmail address is your primary address, and your other email address is only for receiving, you might want to check the box for “Treat as an alias”.
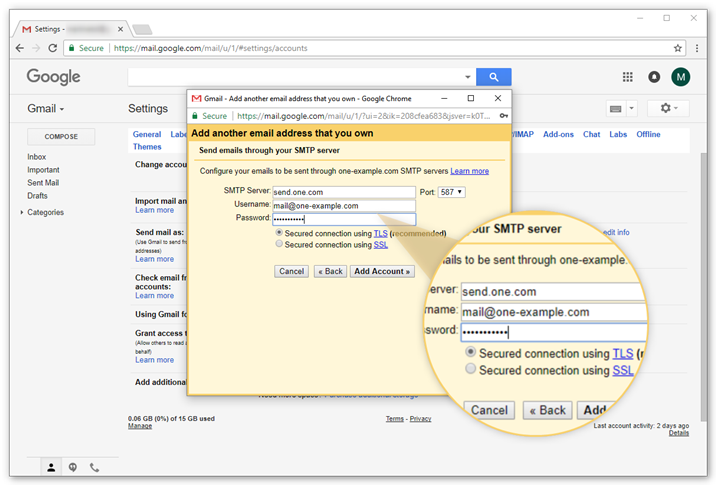
Step 8 – Enter the SMTP Server Settings
Please use the following settings for the outgoing email:
SMTP Server: mail.yourdomainname.com
Username: your email address
Password: the password you use to log in to Webmail
Port: 587
Secured connection: TLS
Click Add account to continue.
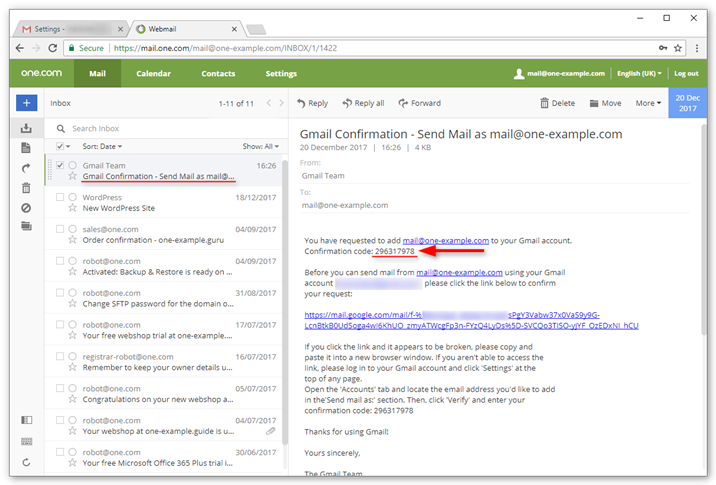
Step 9 – Open the Gmail Confirmation Email
Gmail will now send you an email with a confirmation code.
Log in to Webmail.
Open the email “Gmail Confirmation – Send mail as…“
Copy the confirmation code in the email.
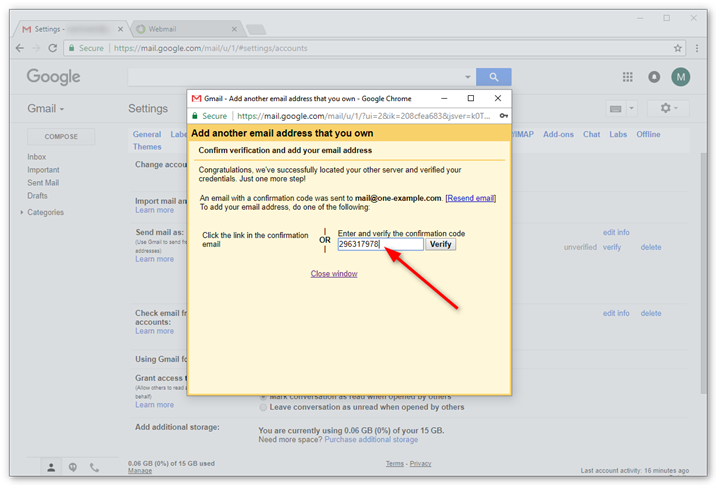
Step 10 – Enter the Verification Code
Paste the verification code in the field and click Verify.
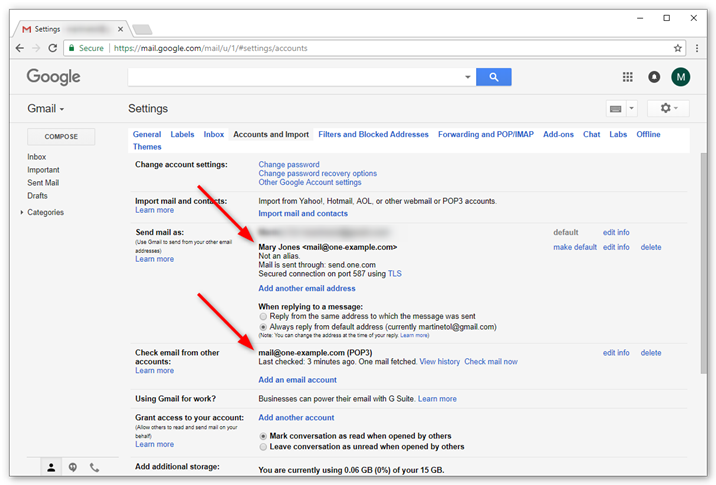
Step 11 – Verify Your Settings
Your account is now set up. You can both send and receive email in Gmail. Check your settings to make sure it’s set up according to your preferences.